Quick Start Guide: Entering a Life History

Here we’ll walk through the steps to enter a life history in the Data Repository, which allows you to use your life history for analysis in the FishKit Size Limit Builder and Stock Health Tracker. Let’s get started!

1. Create an account

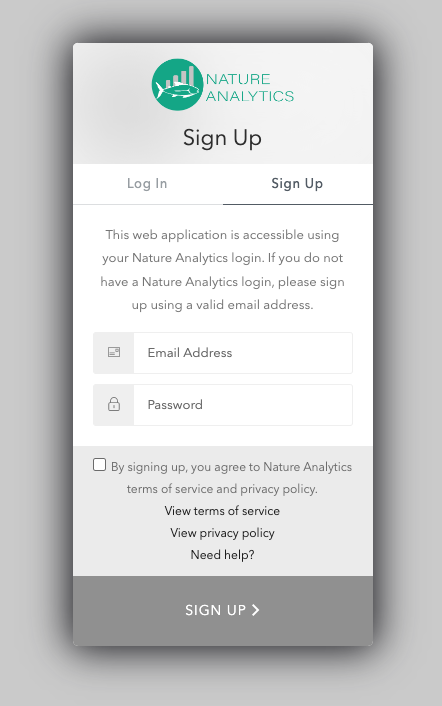
First, you’ll need to either log in or create an account here

2. Enter the Data Repository

Once you’re into the app, on the left side, select “Data Repository.” On the main screen, click the “FishKitData Repository” button. This button will take you to the FishKit Data Repository where you can upload your life history information for use in the FishKit app.

3. Input Your Species

Within the Data Repository, select “life history” from the menu on the left. Then, from the dropdown menu, select “Create new.” 

Start by entering the Genus and species for your species. Then, click “Build a life history interface” in orange.

The Data Repository will load, and then tell you if your species was found in FishBase or SeaLifeBase. Information from these sources can be used later to help you enter in life history information.

4. Enter Life History Information

From there, scroll down to begin entering in your life history information. 

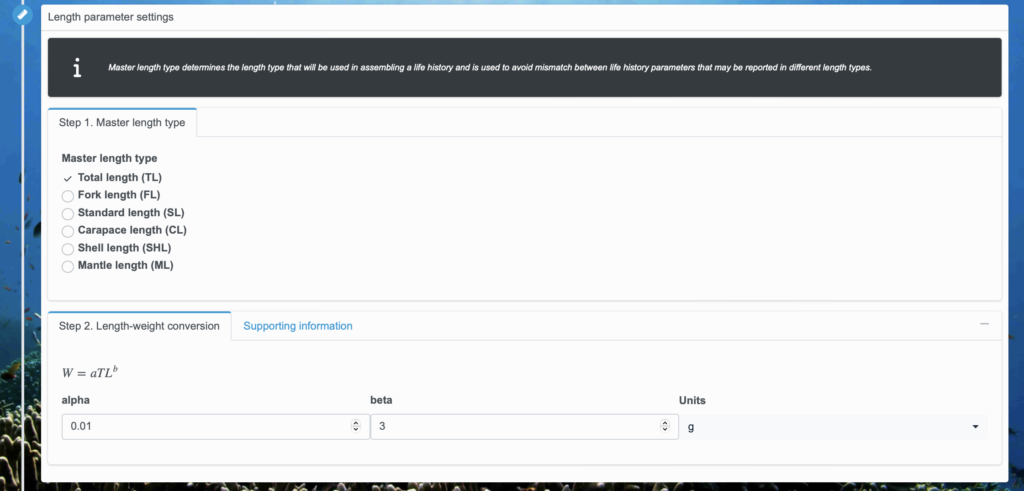
Start by entering information in the “Length parameter settings box.” Here, you’ll enter the master length type in Step 1. Select a master length type from the list, making sure your selection corresponds with your length parameters. 

Then, in Step 2, enter in the length-weight conversion information. Add the appropriate alpha and beta values. See the “Supporting information” tab for information imported from FishBase or SeaLifeBase. 

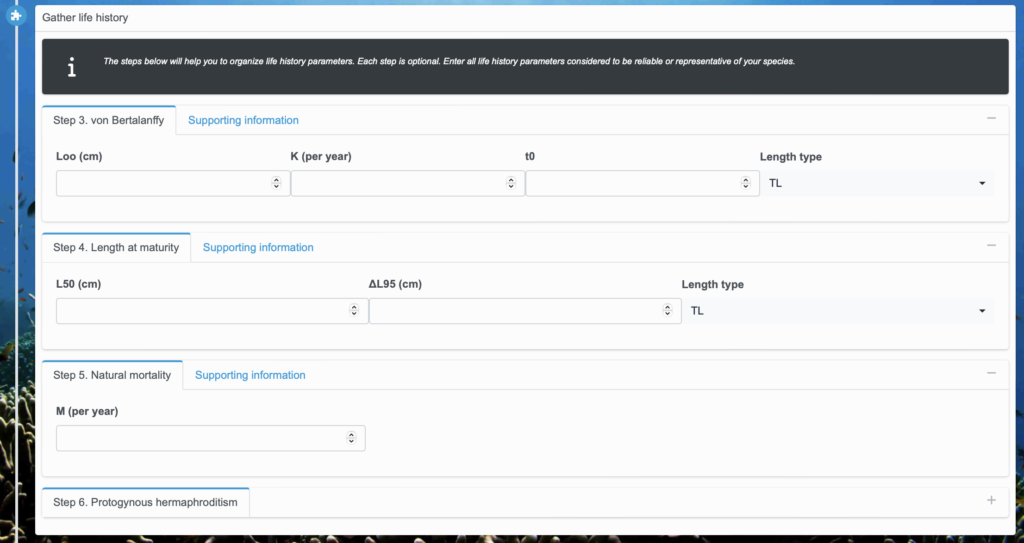
Scroll down to the “Gather life history” box to enter information about life history parameters. Enter in the von Bertalanffy information under Step 3: Loo in cm, K by year, t0, and the length type. 

Then, add in length at maturity information under Step 4: L50 in cm, delta L95 in cm, and the length type. 

Then, add in natural mortality information under Step 5: M by year. 

For information from FishBase or SeaLifeBase, see the “Supporting information” tabs. 

If your species is a protogynous hermaphrodite, click on the “+” sign in the bottom right hand corner to enter in the relevant parameters. 

5. Save the Life History

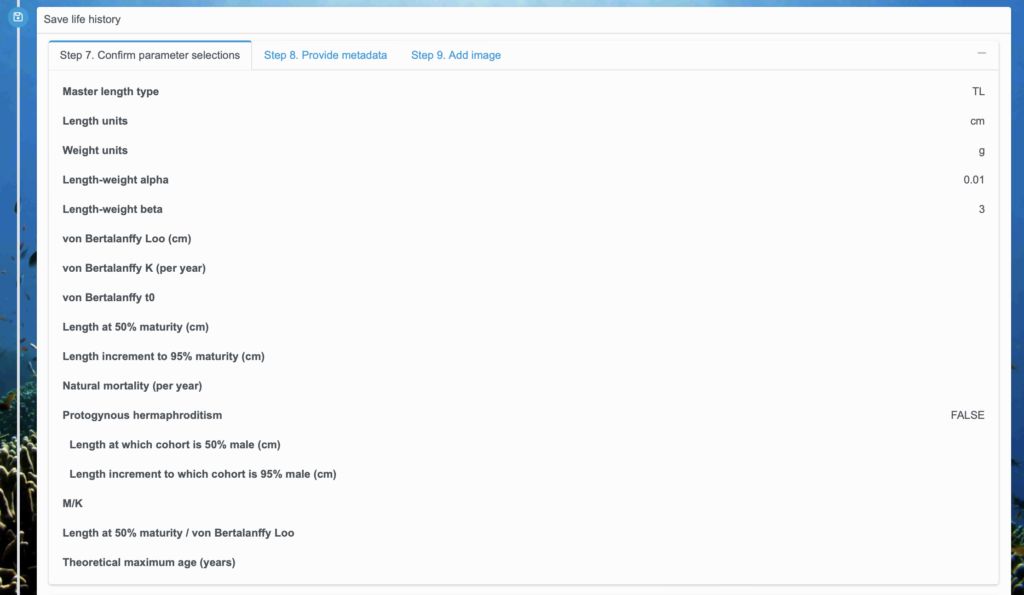
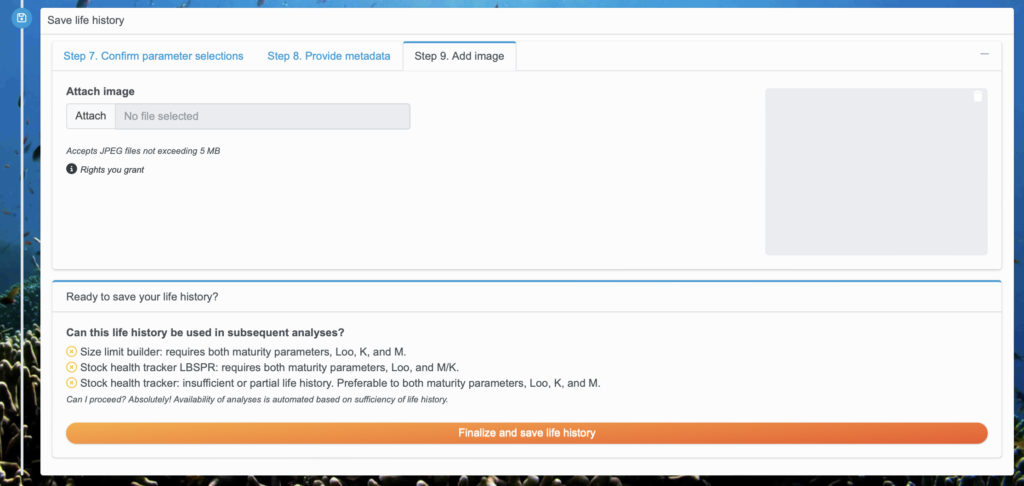
Scroll down to the “Save life history” box. Confirm your parameter selections are all correct in Step 7. If something looks wrong, scroll back up and reenter the information in the corresponding box. 

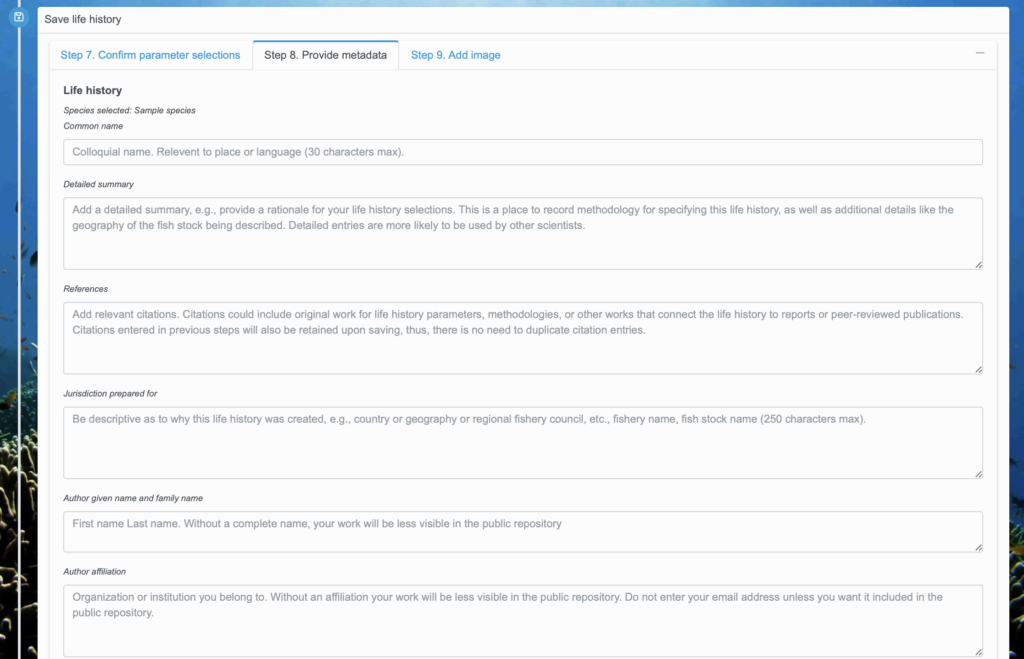
Once all the parameters look correct, select “Step 8: Provide metadata.” Here, enter in the common name for the species, a detailed summary, any relevant references, the jurisdiction this life history is for, your full name, and your affiliation. See the gray text in each box for more details about the information you should enter. The more details you enter, the more useful the life history will be for others trying to use it. 

Then, select “Step 9: Add image.” This is optional, although highly recommended. Attach an image as a JPEG if you would like to include a visual with your life history. 

Then, read through the box “Ready to save your life history?” Make sure the life history has the necessary information to be used in your desired subsequent analyses, as indicated by the green checkmarks. If you see an orange “x” then there is not sufficient information for that particular type of analysis. 

Then, select “Finalize and save life history” to save your life history for future use. Note that this does not automatically share your life history with anyone else. If you would like to share a life history, you will need to go to the “My life histories” tab and select and share the desired life history from there. 

You can continue to enter as many life histories in the Data Repository as you’d like! To view your life histories, click “Your life histories” in the menu on the left.

That concludes the overview of creating a Life History in the Data Repository! Please visit our resources page for more helpful information and tutorials.